Hardy Perennials

In the midst of winter, what better way to find colour in those bleak periods but from smaller hardy annuals/perennials. These plants will provide an array of colour at the front of borders with next to no bother. The perennials will re-appear the following year and the annuals after flowering will have set seed elsewhere.

Cyclamen coums are early and often can be seen alongside Snowdrops (Galanthus nivalis), although Cyclamens flower for a longer period. Snowdrops are known to flower for a matter of weeks. The storage organ of the Cyclamen (Corm) allows you to divide over time and multiply numbers. It flowers from late winter to spring.

Bellis is a good ground cover plant for edges and effective in containers. The perennial will flower in autumn. It is effective in most aspects and can cope with exposed areas. It has a tendency to self seed so dead-head to avoid unecessary growth.

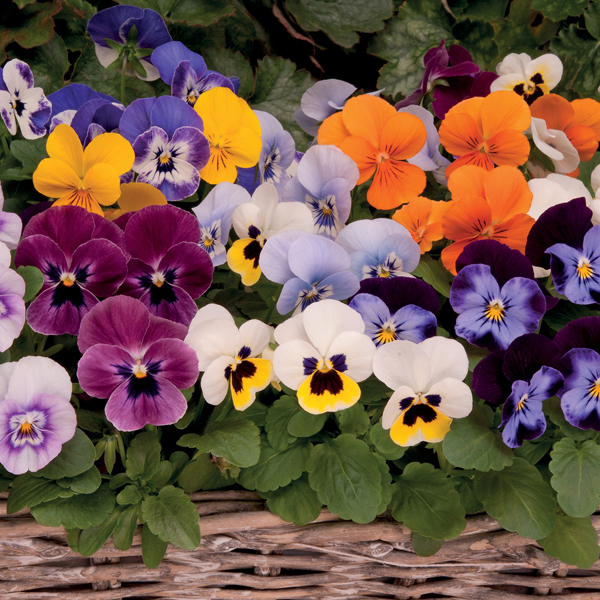
Pansies are not strictly perennial but they can come back and often do. It will flower in late winter to spring. It’s smaller cousin Viola shares the same growth habit.

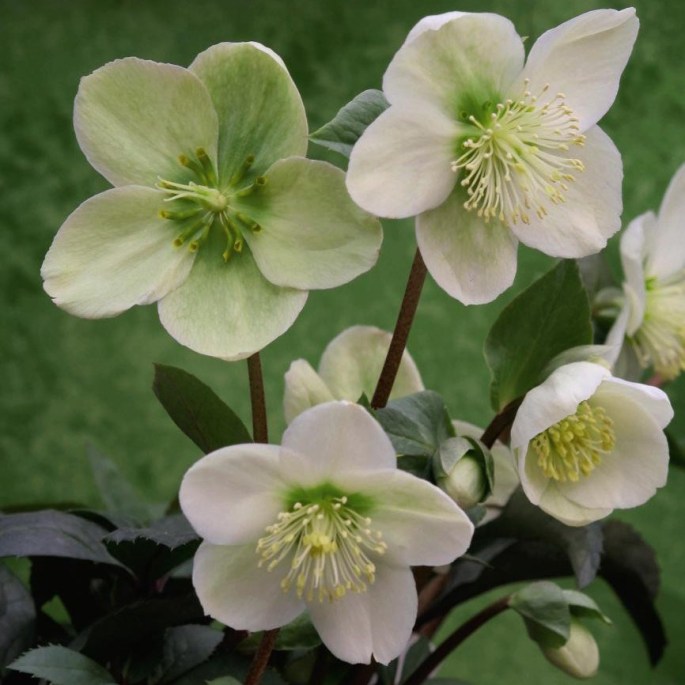
Hellebore (Lentern/Christmas Rose) will flower in winter (usually but there are exceptions). It is generally an easy perennial to look after save very wet soil. The uplifting flowers on the darkest of days. They in fact prefer semi shade.

Primrose/Polyanthus are similar to the Pansy. They often come back and bring colour year after year often improving in their performance. It can be bought as a bedding plant but it will provide you with winter colour right through till spring.

Another spring flowering perennial that often is overlooked is the wallflower. It is hardy and is often incorporated with spring bulbs. It flowers March onwards usually but can be planted in the winter months. Effective in cracks of walls hanging down or in containers.

Bamboo Shoots

Bamboo can come in a variety of sizes, habits, makeup and be used for a wide range of purposes. Screening, windbreaks down to dwarf planting interspaced with ornamental grasses. While strictly speaking a Bamboo is a true grass (Poaceae family), we tend to class the ornamental varieties as such and Bamboo as a tree.

Fargesia murielae (Umbrella Bamboo) is one variety that tends to get used for hedging. It is quick to establish itself, bushy habit providing substantial foliage all year round. It can be crossed with another Fargesia (nitida) which fuses the best of both plants. The thick foliage and attractive canes. Usually an X is indicative of a hybrid or when two plants have been crossed. There are large, thickset Fargesia but some can have quite delicate foliage – F. nitida Gansu ‘Shadow Light’ with its purple canes and F. nitida ‘Volcano’ with its red to black. For dense coverage, there is Fargesia robusta too – a reliable variety that is shade tolerant.

Phyllostachys nigra (Black bamboo) will give you dense foliage and ideal for attractive screening but standing alone it can offer architectural benefits to a garden. Startling results can be achieved with its shiny black canes. Phyllostachys humilis, green in appearance, has an upright habit but more compact. It doesn’t grow as tall but often used as hedging/screening.

Fargesia ‘Black Dragon’ is recommended for this reason. It has a tight clump forming habit with interesting black to purple canes which means it’s effective in standing alone.

The smaller varieties like Pleioblastus are more feathery in appearance but no less invasive. They can be a problem as ground cover. This growth is particularly aggressive with neighbouring plants and often underground. Pleioblastus chino ‘Elegantissimo’ is a good choice for a shaded spot but its root system spreads sideways so probably better in a container or where it can spread. These often need protection from the elements and prefer a sheltered aspect. A small, vigorous growing cousin Sasaella masmuneana albostriata can equally be a problem. In the right place, it can spread so quickly. Having said this, the white striped hairy bamboo is clump forming, very attractive, hardy and offers a energy source to beneficial insects so does have some redeeming qualities.

Ornamental grasses like Miscanthus (the Poaceae family) share clear similarities with softer bamboos. Miscanthus offer plumes of white flora through mid summer and foliage interest into winter, while they are easier to look after and less dominating of their space, Pleioblastus viridistriatus can rival this with its variegated foliage. It offers interest all year round adding green striped, golden yellow leaves to its landscape. As long as the space is adequate and side shoots are kept in check, bamboo’s have a lot to offer.

Effective Climbers

Climbers can take different forms. The growth is largely the same – they climb. How they develop, however, differs. Some need a training tool while other twine themselves by tendrils or root on the surface they will host. Ivy and Virginia Creeper both spread without any aid. Vines usually require support and weave through arbours, pergolas, a trellis or rails. Wisteria is a woody climber and has self supporting branches off which foliage and flowers fall.

Virginia Creeper – A close relative of Ivy. It’s certainly a more attractive one but no less invasive. It also has poisonous sap which is an irritant. Creepers are used effectively on gable ends and unadopted walls. As long as the rendering or brickwork is sound it offers no problem. It does offer fantastic foliage/colour but will inevitably suck the moisture out of the mortar or rendering as plants like this do. Whichever is the less of two evils. You decide.

Honeysuckle – other than keeping the size down, pruning is arbitrary. It can prevent the climber getting woody and does improves vigour but not essential. It will not seriously impede the performance until some time after. After the flowers are spent cut off straggly growth to a visible bud/leaf node. In flowering season it may even give you another show.

Passiflora – A self clinging climber that can cope without a training tool. The plant is relatively hardy as long as in a sheltered spot, although it can be thwarted by a heavy frost. Some additional protection may be in order. A south facing position or the warmest spot is suggested. Each year it is a good idea to cut close to the main frame of the climber leaving the central stem of growth with some side shoots of 3/4 bud nodes on each. There’s flexibility, obviously as long as there is some growth left, it will be fine. This is done after extreme frosts though.

Clematis – there are 3 different methods of pruning and this usually defined by when it flowers. The easiest way to categorise is simply look at the card. It will tell you 1,2,3 or what steps you need to take. With Clematis some you prune, some you don’t! For example:

C.armandii – vigourous climber. An evergreen with White flowers in Spring. So the flowers are produced on last years growth. No pruning necessary.

C. ‘Princess Diana’ – it flowers in Summer on new growth. So prune in late Winter to Spring.

Wisteria is another commonly used climber with its self clinging branches bearing highly scented flowers. The stems will twine together providing support for other weaker growth. A good practice for Wisteria is to concentrate on fewer more productive stems known as lateral shoots. In Summer or after flowering cut back to main central stems and a number of off shoot branches. Leave a number of bud nodes on this. Repeat a little after and a bit lower down the stem. It will prepare it for the following year.

There are Hydrangeas that can be trained offering attractive foliage and being tolerant of little sunlight. There are trailing and climbing Roses that offer fragrance, foliage and flowers. Jasmines too. Many of these are scented so will offer a food source to bees and other beneficial insects. Vines equally once established offer foliage and bear fruit. Very few need more than a “head start” before they are self sufficient and can fend for themselves.

Laying Turf

If a lawn needs to be instant, laying turf is not that complicated. There are steps to follow and rules to be observed, but generally the time-intensive work is in the preparation.

The area needs to be measured and ideally converted to sqm. This will be approximately how many rolls of turf you’ll need. Always take into account a 10% wastage for imperfect or irregular rolls.

A good idea is to have some additional soil when laying to take into account the cutting machine may have cut a roll with an uneven thickness. This can be addressed as you are working backwards.

The ground must have been dug over, rotavated or worked over using a Spade/Fork. Debris will need to be removed from the area as its disturbed. Using a garden rake, work the soil until the particles have been broken down. This is achieved as you are removing debris. At this point, you will have decided if you need to treat the soil or if additional top soil is required. 10 sqm meters to a tonne is approximately how much you would gauge.

The ground will need a 2 inch root zone of filtered, pure, fine soil and this is the ideal base to start laying.

  1. Move backwards so when the turf is unrolled the area then remains undisturbed.
  2. Use large pieces for the perimeter, never put two small pieces together. Always use off cuts in the middle. Use a sharp gardening knife to cut the turf cleanly.
  3. Tamper down the joints where two pieces meet with the tines of a rake.
  4. Using a wooden plank as you move across so as to avoid standing on the newly laid turf .
  5. Secure the joints by gently pressing the plank down on the laid turf. This is a final levelling tool. This area must be left now.
  6. Remember the grass will “shrink and sink” so leave a lip above the desired level since it will drop considerably once the air has dissipated.

There a few more pointers to consider but generally follow these steps and you lawn will take without problems. The area must not be walked on for 2 weeks or so. The area should be kept moist throughout the settling period. When it looks like its root system is in place and you notice it growing – the first cut should be very high and conditions dry.

Another important factor is to prepare the site before you have the turf delivered. There is generally a 3 day rule for turf. The turf should be laid before this period runs out. Ideally the 1st and 2nd day it should be finished. The turf should be to order and the cut made that day or the evening before. Using old turf is a false economy and often the light deprivation has an impact on its vigour.

Turf v Sow

The decision of whether to turf or sow mainly lies with time and cost. The method of turfing will achieve a lawn instantly whereas sowing your seed may take considerably longer, the time of year will need to be considered but will cost a lot less.

Either method is relatively straightforward as long as a number of steps are followed. A rough UK guide to offer a comparative would be £2.00 (2.58$/2.38 e) or under per roll. Each roll being a square metre. A bag of amenity lawn seed costs £15 in the UK (19$ or 17e) per 2.5 kg bag and covers 100 sqm. It’s how much time/money you want to spend on the project.

The time of year may be a factor. The only time of year not suitable for turf laying is high Summer. The grass while it’s knitting together will need to be irrigated, this must be adhered to. The grass as it’s fusing will shrink and sink so watering will help reduce this. The sowing of grass seed ideally should be done in a period where it will not be disturbed. Ideally, beginning of Autumn and before Spring so that in the dormant period it can be developing its root system without any interference.

The preparation time of the site is similar. The ground will need to be broken up and air needs to be circulating throughout the area. All stones will need to be removed. This will allow you to work the soil and achieve a suitable base for the lawn. The soil particles must be as small as you can make them. The laying of turf or sowing of seed will be a lot easier and the finish better. If the ground is compact, the roots will find it difficult to penetrate through the soil and establish themselves. The area is likely to get waterlogged too in wet conditions.

The soil needs to be free draining, so if it is heavy or clay-based this needs to be mixed with some thinning agent. An idea might be to add sand or new top soil with at least a 2 inch root zone. If it is too sandy, it’s likely to scorch in dry periods and so the reverse would be to mix humus matter to the soil and make it more water retaining. This surface needs to be as level as possible and the particles of soil to a “fine tilth”. All this preparation will ensure success of either your turf or seed and generally the whole operation will be smoother.

The type of seed becomes relevant at this point. With the type of turf you’ll find this is usually fixed. If it’s from an amenity area cultivated for sport, it’s likely to include Bents and Fescues – these are often described as “fine grasses”. The lower grade grasses for normal/utility lawns tend to include Ryegrasses and Meadow (Bluegrass) varieties. This area is so complex now, it warrants its own blog. There are pro’s and cons to both these not just on the purpose of the lawn but weed/disease resistance, general resilience, the level of cut it can withstand.